Step-by-Step Guide to the Perfect Homemade Little Cake
Creating these delights requires patience, especially during the proofing stage, but the results are well worth the wait. Follow these organized steps for the best results:
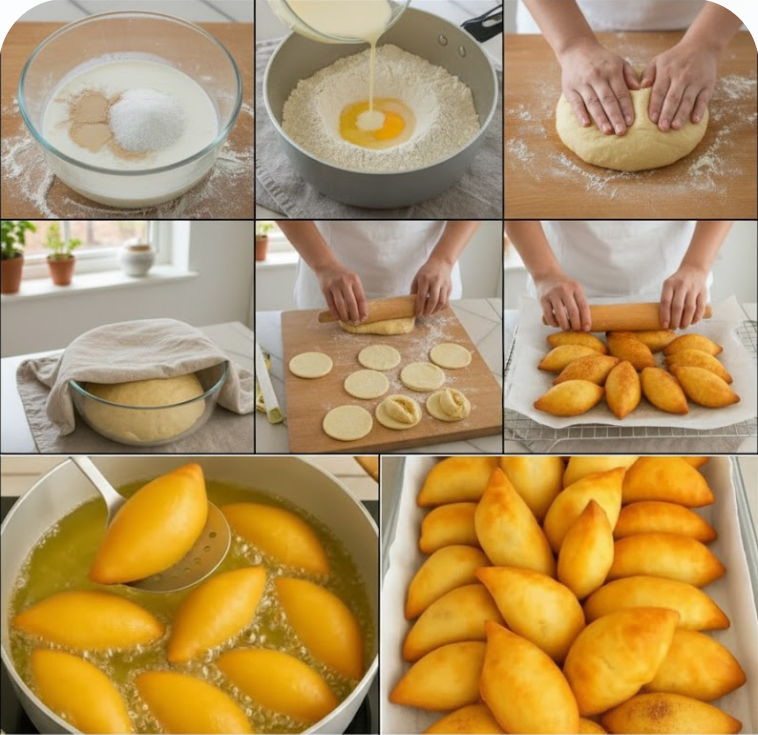
1. Prepare the Yeast Mixture: In a small bowl, combine the warm milk, sugar, and active dry yeast. Let it sit for about 5 to 10 minutes until it becomes frothy and active.
2. Mix the Dough: In a large mixing bowl, sift the flour and salt. Create a well in the center and add the yeast mixture, the softened butter, and the egg. Begin mixing by hand or with a wooden spoon until a shaggy dough forms.
3. Kneading: Transfer the dough to a floured surface. Knead for 8 to 10 minutes until the dough is smooth, elastic, and no longer sticks to your fingers. If using a stand mixer, 5 to 6 minutes on medium-low speed should be sufficient.
4. First Rise: Place the dough in a lightly oiled bowl and cover it with a damp cloth. Let it rise in a warm, draft-free area for about 1 to 1.5 hours, or until it has doubled in size. 🥖
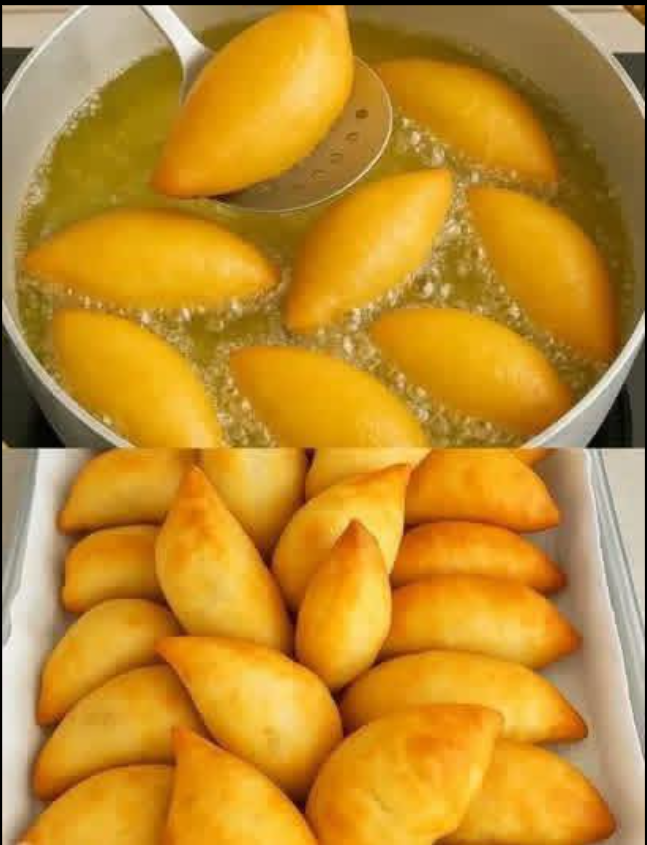
5. Shaping: Gently punch down the dough to release the air. Roll it out to a thickness of about 1 cm. Use a round cutter or a knife to create small ovals or circles. If you wish to add a filling, place a small amount in the center, fold the dough over, and seal the edges tightly.
6. Second Rise: Arrange the shaped pieces on a tray lined with parchment paper. Cover them and let them rest for another 20 minutes. This ensures your homemade little cake stays fluffy after frying.
7. Frying to Perfection: Heat the vegetable oil in a deep pan to 340°F (170°C). Carefully drop 3 to 4 pieces into the oil at a time. Fry for 2 to 3 minutes per side, or until they are a deep golden brown.
8. Draining: Use a slotted spoon to remove the cakes and place them on a wire rack or paper towels to drain any excess oil.
Serving Suggestions and Practical Insights
The beauty of the homemade little cake is its adaptability. For a classic sweet treat, roll them in a mixture of cinnamon and sugar while they are still warm. If you prefer a savory twist, serve them alongside a spicy dipping sauce or stuffed with melted mozzarella. ☕
When frying, it is crucial to maintain a consistent oil temperature. If the oil is too hot, the outside will burn before the inside is cooked; if it is too cool, the dough will absorb too much oil and become greasy. A kitchen thermometer is your best friend here to ensure every homemade little cake comes out light and airy.
Why the Homemade Little Cake is a Kitchen Staple
Making a homemade little cake at home allows you to control the quality of the ingredients, avoiding the preservatives and artificial flavors often found in store-bought snacks. It is an excellent way to involve the whole family in the kitchen, especially during the shaping and filling stages. These little treats are also highly portable, making them ideal for school lunches, picnics, or a quick breakfast on the go.
Furthermore, the dough can be prepared a day in advance and kept in the refrigerator, allowing you to fry fresh cakes whenever the craving strikes. This flexibility makes it a favorite for busy households looking for a touch of homemade luxury. ✨
Whether you enjoy them plain, sugared, or filled, mastering the homemade little cake is a rewarding skill for any home baker. These golden pockets of joy are guaranteed to disappear from the plate within minutes!
What is your favorite filling to put inside a fried cake? Share your creative ideas in the comments below!