
| Activity | Duration |
|---|---|
| Total Time | 2 hours 45 minutes |
| Prep Time | 20 minutes |
| Cook Time | 30 minutes |
| Cool Time | 45 minutes |
Step-by-Step Preparation
Step 1: In a large bowl or the bowl of a stand mixer, combine the warm water, honey, and yeast. Stir gently and let it sit for about 5 to 10 minutes until the mixture becomes foamy.\

Step 2: Add the melted butter and salt to the yeast mixture. Gradually begin adding the flour, one cup at a time, mixing on low speed or with a wooden spoon until a shaggy dough forms.
Step 3: Knead the dough for 5 to 7 minutes by hand or using a dough hook until it is smooth, elastic, and slightly tacky but not sticking to your fingers. If the dough is too wet, add flour one tablespoon at a time.
Step 4: Place the dough in a lightly greased bowl, cover with a clean kitchen towel, and let it rise in a warm, draft-free spot for about 1 to 1.5 hours, or until it has doubled in size.

Step 5: Gently punch down the dough to release air. Shape it into a neat log and place it into a greased 9×5 inch loaf pan. Cover again and let it rise for another 30 to 45 minutes.
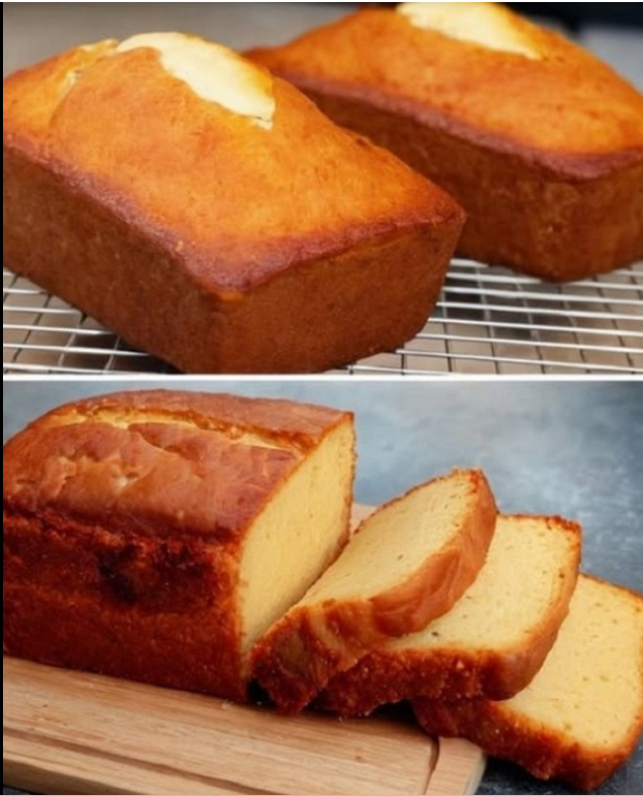
Step 6: Preheat your oven to 350°F. Brush the top of the loaf with a little milk for a golden finish. Bake for 30 to 35 minutes until the top is deep golden brown and the loaf sounds hollow when tapped.
Step 7: Remove the foolproof sandwich bread from the oven and let it cool in the pan for 10 minutes before transferring it to a wire rack to cool completely before slicing.

Why This Method Results in Foolproof Sandwich Bread
The secret to a truly foolproof sandwich bread lies in the hydration and the temperature of the liquids. Using water between 105°F and 110°F ensures the yeast activates without dying. Furthermore, the addition of fat—in this case, melted butter—softens the crumb and extends the shelf life of the loaf. Unlike artisan boules that require high heat and steam, this recipe relies on a steady, moderate oven temperature to create a uniform, soft texture perfect for sandwiches and toast.
Practical Tips for Success
To maintain the integrity of your foolproof sandwich bread, always measure your flour using the “spoon and level” method rather than scooping directly with the measuring cup, which can pack the flour and lead to a dry, dense loaf. If your kitchen is cold, you can let the dough rise inside an oven that is turned off but has the oven light turned on; the small amount of heat from the bulb creates an ideal fermentation environment.
Nutrition Facts (Per Slice)
- Calories: 140 kcal
- Total Fat: 3g
- Sodium: 220mg
- Total Carbohydrates: 24g
- Protein: 4g
Serving and Storage Tips
This bread is best enjoyed fresh, but it makes incredible French toast or grilled cheese after a day or two. To store, keep the loaf in an airtight bag or bread box at room temperature for up to 4 days. For longer storage, slice the bread and freeze it in a freezer-safe bag for up to 3 months. Avoid refrigerating the bread, as the cold environment can actually cause the starch to crystallize faster, leading to a stale texture.
Frequently Asked Questions
Can I use bread flour instead of all-purpose?
Yes! Bread flour has a higher protein content, which will give your foolproof sandwich bread a slightly chewier texture and a taller rise.
What if my dough doesn’t rise?
Check your yeast expiration date and ensure your water wasn’t too hot. Yeast is a living organism and requires the right conditions to thrive.
Can I substitute the butter?
You can use a neutral oil like avocado oil, though the butter provides a richer, more classic “bakery” flavor.
Mastering the art of home baking begins with a reliable, consistent recipe. Once you taste a warm slice of this foolproof sandwich bread slathered in butter, you will never want to go back to the plastic-wrapped loaves from the grocery store.
We would love to hear how your loaves turned out! Share your baking success and tell us what you paired your first slice with in the comments below.